Flashing and Updating
There are two main modules in the HMG that can be flashed and updated:
- ESP32: Responsible for the device's operations, including connection to Ethernet and Wi-Fi, and the functioning of additional systems such as LEDs.
- CC2652P: Controls the Zigbee network and is flashed with Z-Stack 3.x.0 firmware, available at the Official Z-Stack 3.x.0 repository.
Update ESP32
Updating ESP32 Over the Air (OTA)
If your HMG device has a LAN connection, you can update the ESP32 firmware remotely via Over-the-Air (OTA) updates. To update the firmware via OTA, follow these steps:
- Get the latest firmware.
- Access the web interface of the device.
-
Navigate to the Preferences section. In the "ESP32 Update" card:
- Click "Choose file".
- Select the firmware (*.bin file).
- Click "ESP32 OTA Update".

-
Wait for the firmware to finish updating and reboot the device.
Updating ESP32 via USB
If your HMG device is not connected to LAN or you prefer to flash ESP32 via USB for other reasons, it can be easily done using a USB cable. For this purpose, you need:
- A USB cable.
- The firmware file from the dealer.
- Flashing software like
esptool.
Follow these steps:
- Connect the HMG to your PC using the USB cable.
- Open the flashing software and select the firmware file.
- Start the flashing process according to the software instructions.
- Wait for the process to complete and reboot the device.
Update CC2652P
Updating CC2652P via USB
To update the CC2652P module via USB, follow these steps:
- Download the Z-Stack 3.x.0 firmware from the Official Z-Stack 3.x.0 repository.
- Install Texas Instruments Flash Programmer 2 software.
- Connect the CC2652P to your PC using a USB cable.
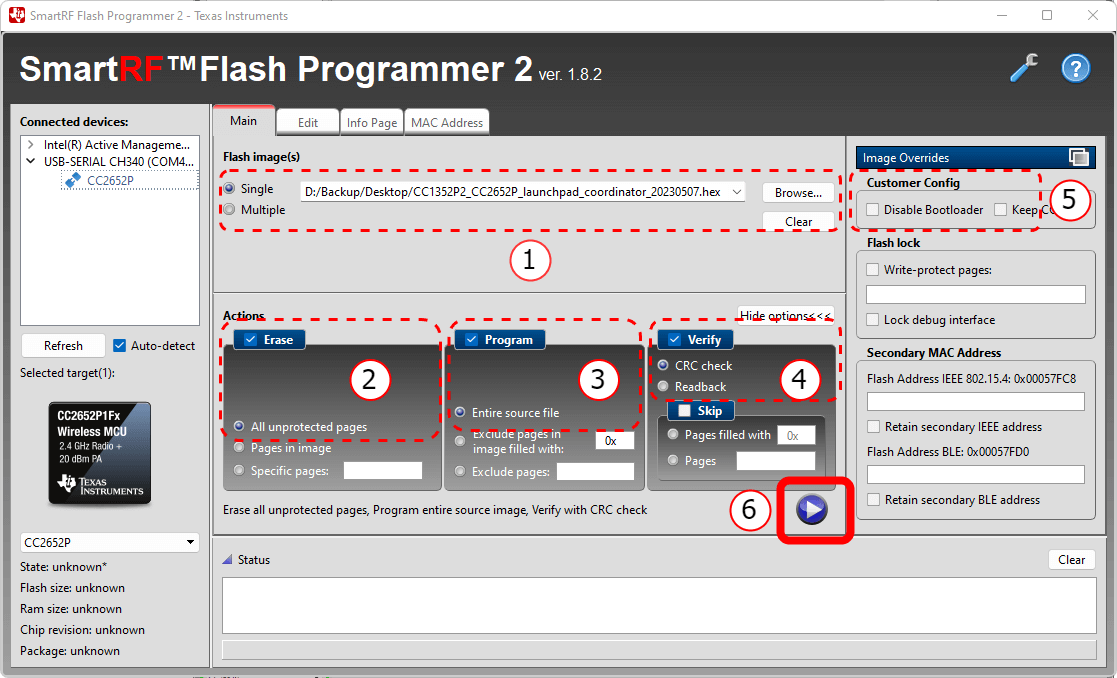
- Open the Flash Programmer 2 software and select the firmware file.
-
Configure the settings:
- Select the firmware file under Flash images with the option
Single. - Enable checkboxes for
Erase(All unprotected pages),Program(Entire source file),Verify(CRC check). - Ensure the
Disable bootloadercheckbox remains UNCHECKED.
- Select the firmware file under Flash images with the option
-
Click the
Startbutton to begin the flashing process. -
Wait until the message
Success!appears in the progress bar and the Status window statesReset of target successful. The flashing takes about 3 seconds.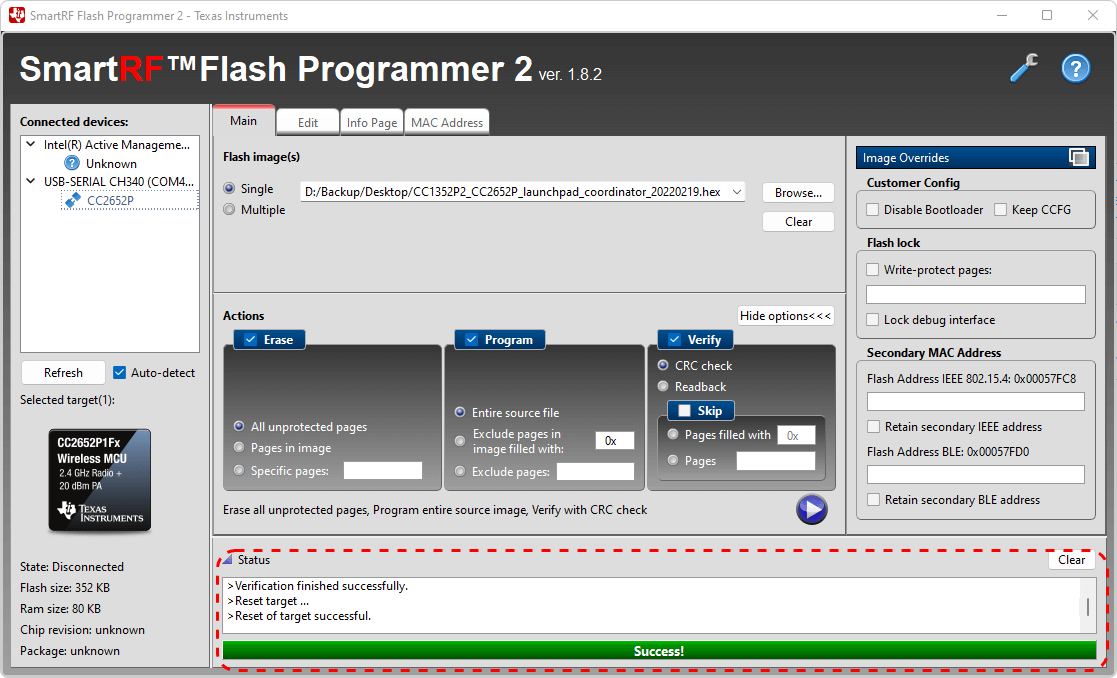
-
The flashing is complete. You can now use your device with the new Zigbee firmware. Proceed with the installation.
Updating with HW Flasher
The HMG adapter has DIY pinouts that enable users to flash directly via J-TAG. Note that the pin-outs are 2.54mm in size.